DART-MX8M Android Camera: Difference between revisions
No edit summary |
|||
| Line 7: | Line 7: | ||
The {{#var:HARDWARE_NAME}} is capable of driving video input via MIPI CSI-2 cameras. | The {{#var:HARDWARE_NAME}} is capable of driving video input via MIPI CSI-2 cameras. | ||
The CSI-2 Host Controller is a digital core that implements all protocol functions defined in the MIPI CSI-2 specification, providing an interface between the system and the MIPI D-PHY, | The CSI-2 Host Controller is a digital core that implements all protocol functions defined in the MIPI CSI-2 specification, <br> providing an interface between the system and the MIPI D-PHY <br>, | ||
Key features | this allows communication with a MIPI CSI-2 compliant camera sensor to host processor bus.<br> | ||
The Key features includes:<br> | |||
* Module provides {{#ifeq: {{#var:HARDWARE_NAME}} | DART-MX8M| Two |One}} four-lane MIPI camera serial interfaces | * Module provides {{#ifeq: {{#var:HARDWARE_NAME}} | DART-MX8M| Two |One}} four-lane MIPI camera serial interfaces | ||
* MIPI D-PHY specification V1.2 (Board Approved) | * MIPI D-PHY specification V1.2 (Board Approved) | ||
| Line 16: | Line 17: | ||
** RGB565, RGB666, RGB888 | ** RGB565, RGB666, RGB888 | ||
** RAW6, RAW7, RAW8, RAW10, RAW12, RAW14 | ** RAW6, RAW7, RAW8, RAW10, RAW12, RAW14 | ||
** All | ** All User-defined Byte-based Data packet | ||
* Support up to 4 lanes of D-PHY, which operates up to a maximum bit rate of 1.5 Gbps/lane. | * Support up to 4 lanes of D-PHY, which operates up to a maximum bit rate of 1.5 Gbps/lane. | ||
* Interfaces | * Interfaces | ||
| Line 23: | Line 24: | ||
** Image output data bus width: 32 bits | ** Image output data bus width: 32 bits | ||
* Image memory | * Image memory | ||
** | ** The size of SRAM is 4KB | ||
* Pixel clock can be gated when no PPI data is coming | * Pixel clock can be gated when no PPI data is coming | ||
| Line 36: | Line 37: | ||
Connect the relevant camera accessories to the right connector. | Connect the relevant camera accessories to the right connector. | ||
*{{#var:HARDWARE_NAME}} Development Kit: | *{{#var:HARDWARE_NAME}} Development Kit: | ||
**CSI1 - MIPI Clock + 4 Data lanes are accessible via Carrier board header. | **CSI1 - MIPI Clock + 4 Data lanes are accessible via the Carrier board header. | ||
**J11: MIPI - 4 Lane + CLK + I2C + GPIOs<br> | **J11: MIPI - 4 Lane + CLK + I2C + GPIOs<br> | ||
**MIPI Camera Accessories Required: https://www.variscite.com/product/accessories/var-ext-cb8/ | **MIPI Camera Accessories Required: https://www.variscite.com/product/accessories/var-ext-cb8/ | ||
Note: | Note: | ||
* {{#var:HARDWARE_NAME}} platform doesn't have the SOC based Image Signal Processing (ISP) unit to convert bayer data to RGB and YUV. | * {{#var:HARDWARE_NAME}} platform doesn't have the SOC-based Image Signal Processing (ISP) unit to convert bayer data to RGB and YUV. | ||
* {{#var:HARDWARE_NAME}} platform relies on MIPI camera to convert the Bayer data to YUV format. | * {{#var:HARDWARE_NAME}} platform relies on MIPI camera to convert the Bayer data to YUV format. | ||
* For maximum, supported resolution and combinations refer to datasheet | * For maximum, supported resolution and combinations refer to the datasheet | ||
=Software Setup= | =Software Setup= | ||
| Line 59: | Line 60: | ||
* Camera2 APIs are supported out of the box. | * Camera2 APIs are supported out of the box. | ||
* Legacy Camera1 APIs should also work. | * Legacy Camera1 APIs should also work. | ||
* Auto Focus, Manual Focus, Auto Exposure and Manual | * Auto Focus, Manual Focus, Auto Exposure, and Manual Exposure are not supported at present. | ||
=Testing Camera= | =Testing Camera= | ||
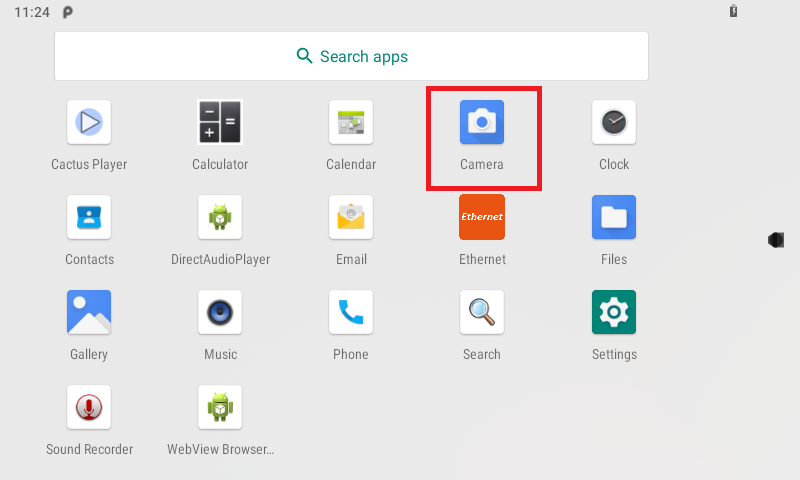
If the camera is connected/configured correctly. Once you click the Android Camera Application mentioned | If the camera is connected/configured correctly. Once you click the Android Camera Application mentioned below. | ||
[[File:Imx8_Camera_App.png]] | [[File:Imx8_Camera_App.png]] | ||
It will ask you for location , and storage permissions, click on allow and then click next. | It will ask you for location, and storage permissions, click on allow and then click next. | ||
The camera preview should start, like below<br> | The camera preview should start, like below<br> | ||
[[File:Imx8_Camera_Preview.png]] | [[File:Imx8_Camera_Preview.png]] | ||
Click on the Camera icon, it will take JPEG snapshot. | Click on the Camera icon, it will take a JPEG snapshot. | ||
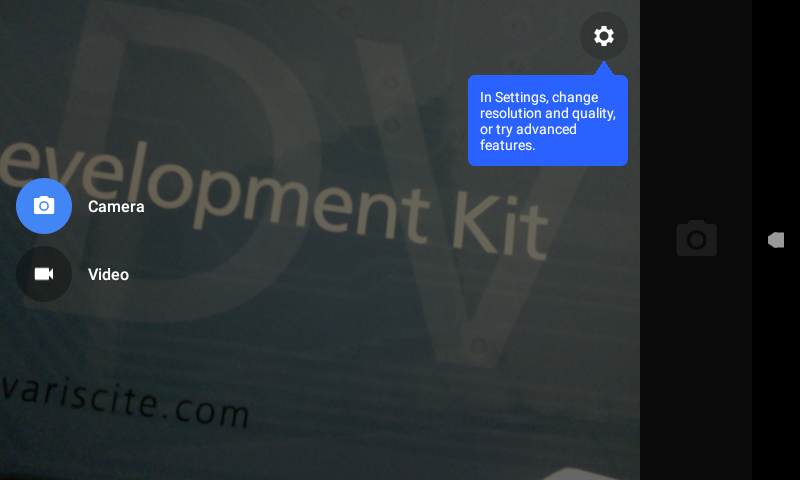
If you wish to record/video, click on the leftmost side of the preview screen you will see moving UI.<br> | If you wish to record/video, click on the leftmost side of the preview screen you will see moving UI.<br> | ||
[[File:Imx8_Camera_Recording_opts.png]] | [[File:Imx8_Camera_Recording_opts.png]] | ||
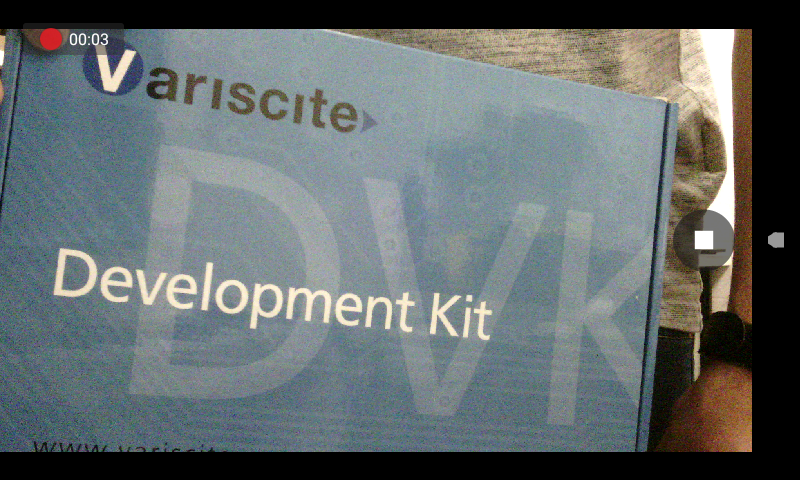
Click on Video Recording Button , it will record the video like below. <br> | Click on the Video Recording Button, it will record the video like below. <br> | ||
[[File:Imx8_Camera_recording_in_progress.png]] | [[File:Imx8_Camera_recording_in_progress.png]] | ||
Revision as of 10:31, 18 September 2023
Overview
The DART-MX8M is capable of driving video input via MIPI CSI-2 cameras.
The CSI-2 Host Controller is a digital core that implements all protocol functions defined in the MIPI CSI-2 specification,
providing an interface between the system and the MIPI D-PHY
,
this allows communication with a MIPI CSI-2 compliant camera sensor to host processor bus.
The Key features includes:
- Module provides Two four-lane MIPI camera serial interfaces
- MIPI D-PHY specification V1.2 (Board Approved)
- Compliant to MIPI CSI2 Specification V1.3 except for C-PHY feature (Board Approved)
- Support primary and secondary Image format
- YUV420, YUV420 (Legacy), YUV420 (CSPS), YUV422 of 8-bits and 10-bits
- RGB565, RGB666, RGB888
- RAW6, RAW7, RAW8, RAW10, RAW12, RAW14
- All User-defined Byte-based Data packet
- Support up to 4 lanes of D-PHY, which operates up to a maximum bit rate of 1.5 Gbps/lane.
- Interfaces
- Compatible to PPI (Protocol-to-PHY Interface) in MIPI D-PHY Specification
- AMBA3.0 APB Slave for Register configuration.
- Image output data bus width: 32 bits
- Image memory
- The size of SRAM is 4KB
- Pixel clock can be gated when no PPI data is coming
Note:
- At present OV5640 supports only YUV 422 image format.
MIPI-CSI2
The DART-MX8M exposes two MIPI-CSI input ports of the SOC.
Refer to: https://www.variscite.com/wp-content/uploads/2018/03/DART-MX8M-datasheet.pdf for more details.
Hardware Availability and Setup
Connect the relevant camera accessories to the right connector.
- DART-MX8M Development Kit:
- CSI1 - MIPI Clock + 4 Data lanes are accessible via the Carrier board header.
- J11: MIPI - 4 Lane + CLK + I2C + GPIOs
- MIPI Camera Accessories Required: https://www.variscite.com/product/accessories/var-ext-cb8/
Note:
- DART-MX8M platform doesn't have the SOC-based Image Signal Processing (ISP) unit to convert bayer data to RGB and YUV.
- DART-MX8M platform relies on MIPI camera to convert the Bayer data to YUV format.
- For maximum, supported resolution and combinations refer to the datasheet
Software Setup
Make sure you have the required hardware as per above.
MIPI Cameras
By default, MIPI cameras are supported out of the box.
Android System / Vendor images contain Camera HAL already support for OV5640 5MP support available.
You don't need to do any special build/addition below HAL if you are using the standard camera.
Unless you wish to modify for your custom camera type,
- For Android Oreo:
Source Path: <android_build>/vendor/nxp-opensource/imx/libcamera3/
Note:
- Android 8.0 and above Camera2 APIs are standard.
- Camera2 APIs are supported out of the box.
- Legacy Camera1 APIs should also work.
- Auto Focus, Manual Focus, Auto Exposure, and Manual Exposure are not supported at present.
Testing Camera
If the camera is connected/configured correctly. Once you click the Android Camera Application mentioned below.
It will ask you for location, and storage permissions, click on allow and then click next.
The camera preview should start, like below
Click on the Camera icon, it will take a JPEG snapshot.
If you wish to record/video, click on the leftmost side of the preview screen you will see moving UI.

Click on the Video Recording Button, it will record the video like below.

Snapshot:
- JPEG snapshot with maximum 5MP supported
Video Recording:
- Encoding upto 480@30fps (Software based)

