VAR-SOM-MX6 Yocto GS eclipse: Difference between revisions
No edit summary |
|||
| (4 intermediate revisions by the same user not shown) | |||
| Line 7: | Line 7: | ||
== Build == | == Build == | ||
Change directory to your build directory and verify that environment settings | Change directory to your build directory and verify that your environment settings is set correctly. | ||
<pre>$ . ./setup-environment build_mx6q/ | <pre>$ . ./setup-environment build_mx6q/ | ||
</pre> | </pre> | ||
| Line 17: | Line 17: | ||
<pre>$ ls tmp/deploy/sdk/ | <pre>$ ls tmp/deploy/sdk/ | ||
</pre> | </pre> | ||
The outcome should be:<br/> adt_installer.tar.bz2 poky-eglibc-x86_64-meta-toolchain-cortexa9hf-vfp-neon-toolchain-1.5.1.sh | The outcome should be:<br/> adt_installer.tar.bz2 poky-eglibc-x86_64-meta-toolchain-cortexa9hf-vfp-neon-toolchain-1.5.1.sh <br/> | ||
== Install SDK == | == Install SDK == | ||
<pre>$ tmp/deploy/sdk/poky-eglibc-x86_64-meta-toolchain-cortexa9hf-vfp-neon-toolchain-1.5.1.sh | <pre>$ tmp/deploy/sdk/poky-eglibc-x86_64-meta-toolchain-cortexa9hf-vfp-neon-toolchain-1.5.1.sh | ||
| Line 32: | Line 32: | ||
Setting it up...done | Setting it up...done | ||
SDK has been successfully set up and is ready to be used. | SDK has been successfully set up and is ready to be used. | ||
</pre> | |||
= Eclipse installation = | = Eclipse installation = | ||
| Line 67: | Line 67: | ||
#Expand the box next to "Programming Languages" and select the Autotools Support for CDT and C/C++ Development Tools boxes. | #Expand the box next to "Programming Languages" and select the Autotools Support for CDT and C/C++ Development Tools boxes. | ||
#Complete the installation and restart the Eclipse IDE.<br/> | #Complete the installation and restart the Eclipse IDE.<br/> | ||
{{note|Comment:<br/>Some of the packages may be already installed.|info}} An install window example:<br/> [[File:Eclipse install add.jpg]] <br/> | |||
== Yocto plug-in == | == Yocto plug-in == | ||
| Line 182: | Line 181: | ||
*Accept the debug perspective. | *Accept the debug perspective. | ||
[[File:Dbg2.jpg]] | [[File:Dbg2.jpg]] | ||
Latest revision as of 07:42, 18 June 2014
Variscite's Yocto release includes the required packages to the build images fsl-image-test and fsl-image-gui with Eclipse debug support. This guide will describe how to use Eclipse to develop applications to run on the VAR-SOM-MX6.
Detail information can be found:
http://www.yoctoproject.org/docs/latest/mega-manual/mega-manual.html#application-development-workflow
Host tools
Build
Change directory to your build directory and verify that your environment settings is set correctly.
$ . ./setup-environment build_mx6q/
Build the tools:
$ bitbake meta-ide-support
$ bitbake meta-toolchain adt-installer
The build creates the tools installer
$ ls tmp/deploy/sdk/
The outcome should be:
adt_installer.tar.bz2 poky-eglibc-x86_64-meta-toolchain-cortexa9hf-vfp-neon-toolchain-1.5.1.sh
Install SDK
$ tmp/deploy/sdk/poky-eglibc-x86_64-meta-toolchain-cortexa9hf-vfp-neon-toolchain-1.5.1.sh
When system prompts "Enter target directory for SDK (default: /opt/poky/1.5.1):" hit enter.
When system prompts "You are about to install the SDK to "/opt/poky/1.5.1". Proceed[Y/n]?" hit Y and enter.
An installation log should look like:
 tmp/deploy/sdk/poky-eglibc-x86_64-meta-toolchain-cortexa9hf-vfp-neon-toolchain-1.5.1.sh
 Enter target directory for SDK (default: /opt/poky/1.5.1):
 You are about to install the SDK to "/opt/poky/1.5.1". Proceed[Y/n]?Y
 Extracting SDK...done
 Setting it up...done
 SDK has been successfully set up and is ready to be used.
Eclipse installation
The following steps will guide you how to download and install Eclipse Kepler CDT SR1.
Download and install
Download from:
$ cd ~/
$ tar xvf ../Downloads/eclipse-cpp-kepler-SR1-linux-gtk-x86_64.tar.gz
Run Eclipse:
$ eclipse/eclipse &
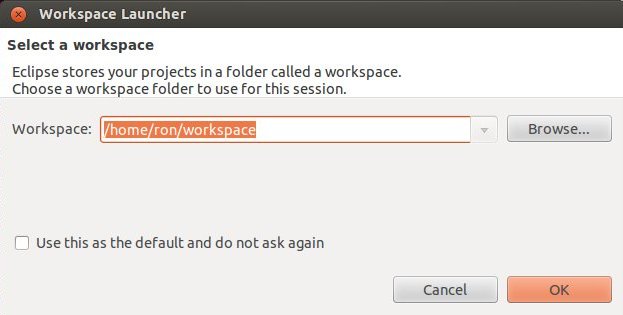
Set your workspace:

You can select any folder you like.
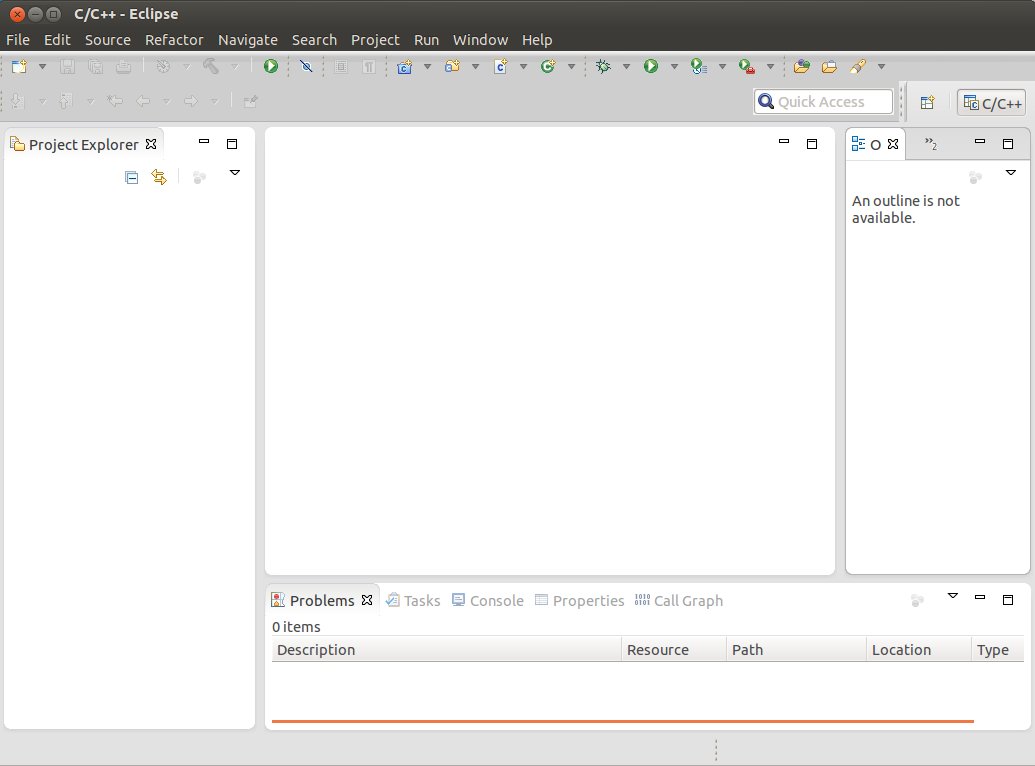
Close the "welcome window".
You should be at:

Eclipse installations of additional packages
- Start the Eclipse IDE.
- Make sure you are in your Workbench and select "Install New Software" from the "Help" pull-down menu.
- Select Kepler - http://download.eclipse.org/releases/kepler from the "Work with:" pull-down menu.
- Expand the box next to "Linux Tools" and select the LTTng - Linux Tracing Toolkit boxes.
- Expand the box next to "Mobile and Device Development" and select the following boxes:
- C/C++ Remote Launch
- Remote System Explorer End-user Runtime
- Remote System Explorer User Actions
- Target Management Terminal
- TCF Remote System Explorer add-in
- TCF Target Explorer
- Expand the box next to "Programming Languages" and select the Autotools Support for CDT and C/C++ Development Tools boxes.
- Complete the installation and restart the Eclipse IDE.
Some of the packages may be already installed.
Yocto plug-in
There are more then one option to get the plug-in. We selected to use: Pre-built Plug-in from the Yocto Project Eclipse Update Site
To install the Eclipse Yocto Plug-in from the update site, follow these steps:
- Start up the Eclipse IDE.
- In Eclipse, select "Install New Software" from the "Help" menu.
- Click "Add..." in the "Work with:" area.
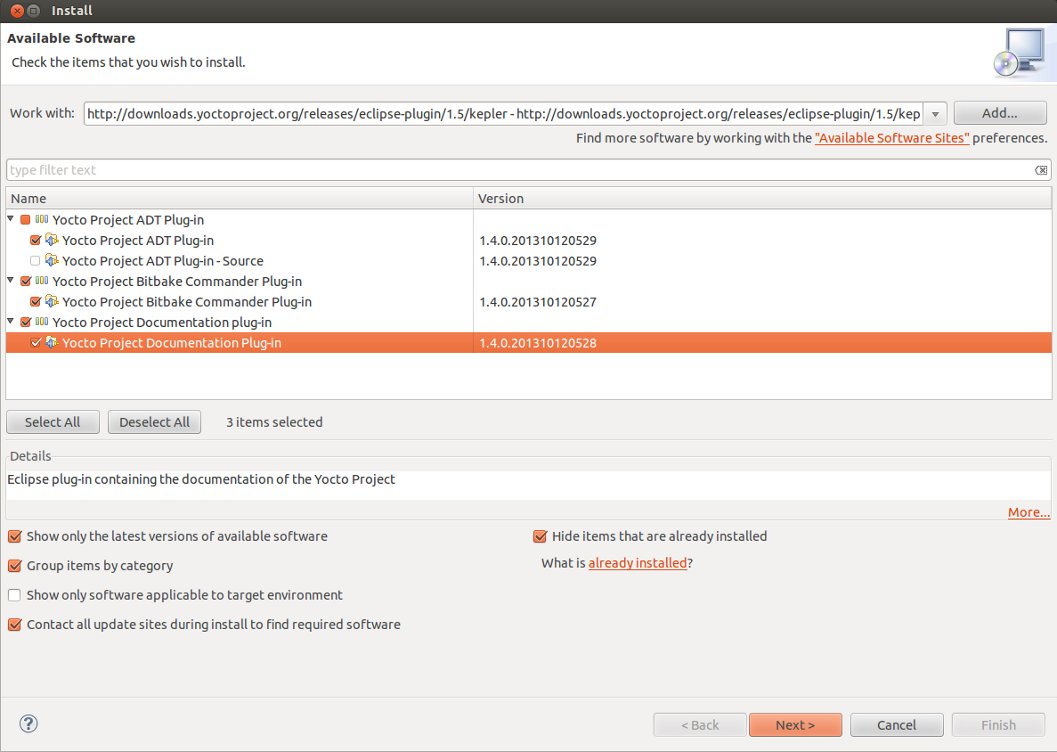
- Enter http://downloads.yoctoproject.org/releases/eclipse-plugin/1.5/kepler in the URL field and provide a meaningful name in the "Name" field.
- Click "OK" to have the entry added to the "Work with:" drop-down list.
- Select the entry for the plug-in from the "Work with:" drop-down list.
- Check the boxes next to Yocto Project ADT Plug-in, Yocto Project Bitbake Commander Plug-in, and Yocto Project Documentation plug-in.
- Complete the remaining software installation steps and then restart the Eclipse IDE to finish the installation of the plug-in.
Configuring the Eclipse Yocto Plug-in
Configuring the Eclipse Yocto Plug-in involves setting up the Cross Compiler options and the Target options. The configurations you choose become the default settings for all projects. You have opportunities to change them later when you configure the project (see the following section). To start, you need to do the following from within the Eclipse IDE:
- Choose "Preferences" from the "Windows" menu to display the Preferences Dialog.
- Click "Yocto Project ADT".
Configuring the Cross-Compiler Options
To configure the Cross Compiler Options, you must select the type of toolchain, point to the toolchain, specify the sysroot location, and select the target architecture.
- Selecting the Toolchain Type:
If you build your target based on Variscite WIKI your Toolchanin path will be /home/<uname>/var-som-mx6-dora-v3/build_mx6q. Otherwise point to your build folder.
- Specify the Sysroot Location:
If you build your target based on Variscite WIKI your Toolchanin path will be /home/<uname>/var-som-mx6-dora-v3/build_mx6q/tmp/sysroots/varsommx6q. Otherwise point to your build folder.
This location is where the root filesystem for the target hardware resides.
- Select the Target Architecture: The target architecture will be selected automatically based on your build.
Create and run a simple application
Create the Project
You can create two types of projects: Autotools-based, or Makefile-based. This section describes how to create Autotools-based projects from within the Eclipse IDE. To create a project based on a Yocto template and then display the source code, follow these steps:
- File->New->C Project
- Click Yocto Project ADT Project.
- Select Hello World ANSI C Autotools Project. This is an Autotools-based project based on a Yocto template.
- Put a name in the Project name: field. Do not use hyphens as part of the name.
- Click "Next".
- Add information in the Author and Copyright notice fields.
- Be sure the License field is correct.
- Click "Finish".
- If the "open perspective" prompt appears, click "Yes" so that you in the C/C++ perspective.
- The left-hand navigation pane shows your project. You can display your source by double clicking the project's source file.
- "hit Ctrl B" It will build your project.
Create communication link
Using the console of your target set a password with "passwd" command. choose a simple one named "root". The target should be connected to the network via Ethernet or WIFI. Use the "ifconfig" command to get the target ip address. From Eclipse
- Window->Open Perspective->Other
- Double click on Remote System Explorer
- In the left bar right click and New->Connection
- Choose TCF and Next
- Set the Host name to the target IP
- Hit Finish
- On the left bar right click on the taget IP and select connect
- Set "User ID:" to root, "Password:" to root and check the "Save password"
- enter the root password again in the next poop up.
Once connected you can browse target file system, browse target process and lunch a terminal to the target.
Remote debug
Follow the below steps to remotely debug your application on the VAR-SOM-MX6.
- Select "Debug Configurations..." from the "Run" menu.
- In the left area, expand C/C++Remote Application.
- Locate your project and select it to pop up a new tabbed view in the Debug Configurations Dialog.
- Enter the absolute path which you want to deploy the application to. Use the "Remote Absolute File Path for C/C++Application:" field. For example, enter /home/root/hello
- Click on the "Debugger" tab to see the cross-tool debugger you are using.
- Click on the "Main" tab.
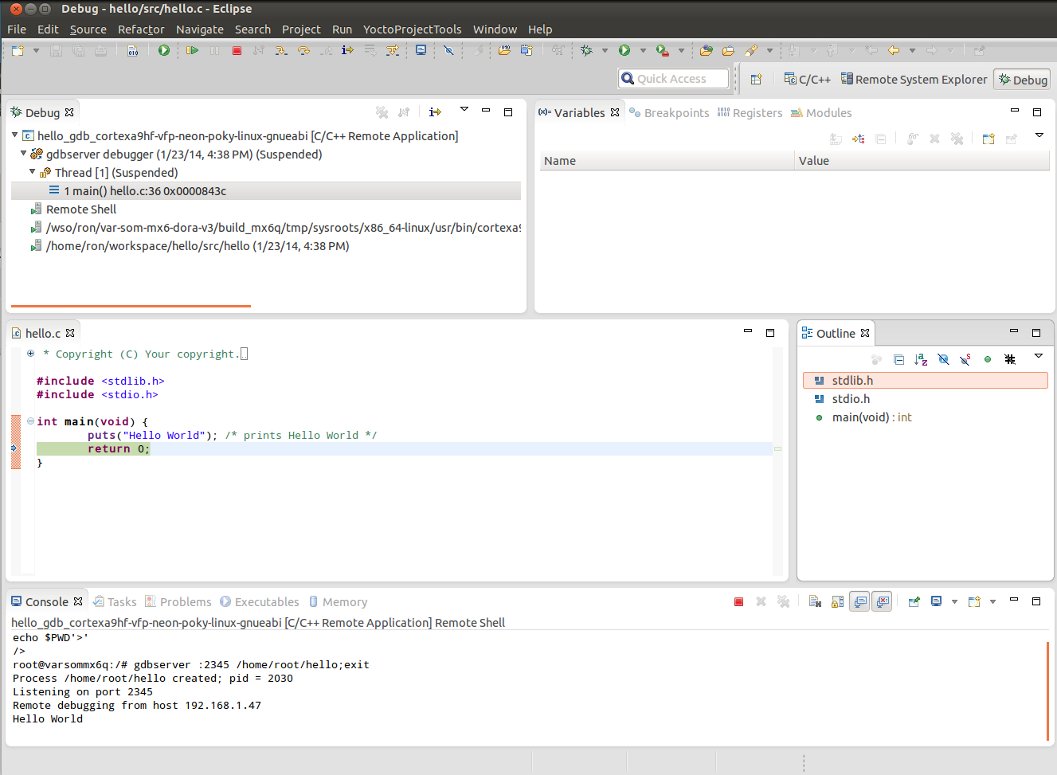
- Hit Debug
- Accept the debug perspective.


