Debian Programming with Eclipse: Difference between revisions
No edit summary |
(Update pictures) |
||
| (5 intermediate revisions by the same user not shown) | |||
| Line 18: | Line 18: | ||
In this guide, we will focus on Remote Debugging with the Eclipse IDE using '''gdbserver'''.<br>|info}} | In this guide, we will focus on Remote Debugging with the Eclipse IDE using '''gdbserver'''.<br>|info}} | ||
The packages can be installed | The packages can be installed by running the following commands on the target: | ||
$ apt-get update && apt-get -y upgrade | |||
$ apt-get update | |||
$ apt-get -y install gdbserver openssh-sftp-server <!-- | $ apt-get -y install gdbserver openssh-sftp-server <!-- | ||
-->{{Note|'''Note:''' The package '''openssh-sftp-server''' may possibly already be installed.|info}} | -->{{Note|'''Note:''' The package '''openssh-sftp-server''' may possibly already be installed.|info}} | ||
If you want to learn how to add the packages at compile time, please refer to {{Varlink2|Adding Debian packages|{{#var:RELEASE_LINK}}}}. | |||
= Setup Host Computer Environment = | = Setup Host Computer Environment = | ||
| Line 55: | Line 36: | ||
== Install Debian Toolchain == | == Install Debian Toolchain == | ||
{{ | To install the toolchain, follow the {{Varlink2|Debian Toolchain installation|{{#var:RELEASE_LINK}}}} guide. | ||
== Download Eclipse == | == Download Eclipse == | ||
| Line 102: | Line 74: | ||
* Enter <code>${HOME}/{{#var:BUILD_FOLDER_NAME}}/toolchain/{{#var:TOOLCHAIN}}/bin</code> under ''Cross compiler path'' | * Enter <code>${HOME}/{{#var:BUILD_FOLDER_NAME}}/toolchain/{{#var:TOOLCHAIN}}/bin</code> under ''Cross compiler path'' | ||
[[File: | [[File:eclipse_compiler_debian.png|800px]] | ||
* Click "Finish". | * Click "Finish". | ||
| Line 118: | Line 90: | ||
* Add the following include path to ''Cross GCC Compiler->Includes'' | * Add the following include path to ''Cross GCC Compiler->Includes'' | ||
${HOME}/{{#var:BUILD_FOLDER_NAME}}/ | ${HOME}/{{#var:BUILD_FOLDER_NAME}}/toolchain/sysroot/usr/include | ||
''C/C++ Build -> Settings -> Cross GCC Compiler -> Includes'' | ''C/C++ Build -> Settings -> Cross GCC Compiler -> Includes'' | ||
[[File: | [[File:eclipse_toolchain_include_debian.png]] | ||
* Append the following to ''Cross GCC Compiler -> Miscellaneous -> Other Flags'': | * Append the following to ''Cross GCC Compiler -> Miscellaneous -> Other Flags'': | ||
--sysroot=${HOME}/{{#var:BUILD_FOLDER_NAME}}/ | --sysroot=${HOME}/{{#var:BUILD_FOLDER_NAME}}/toolchain/sysroot | ||
''C/C++ Build -> Settings -> Cross GCC Compiler -> Miscellaneous'' | ''C/C++ Build -> Settings -> Cross GCC Compiler -> Miscellaneous'' | ||
[[File: | [[File:eclipse_toolchain_settings_debian.png]] | ||
* Append the following to ''Cross GCC Linker -> Miscellaneous -> Other Flags'': | * Append the following to ''Cross GCC Linker -> Miscellaneous -> Other Flags'': | ||
--sysroot=${HOME}/{{#var:BUILD_FOLDER_NAME}}/ | --sysroot=${HOME}/{{#var:BUILD_FOLDER_NAME}}/toolchain/sysroot | ||
''C/C++ Build -> Settings -> Cross GCC Linker -> Miscellaneous'' | ''C/C++ Build -> Settings -> Cross GCC Linker -> Miscellaneous'' | ||
[[File: | [[File:eclipse_toolchain_settings_2_debian.png]] | ||
== Configure Remote Debugging == | == Configure Remote Debugging == | ||
| Line 149: | Line 121: | ||
* Next, click on ''New...'' to create a new connection. | * Next, click on ''New...'' to create a new connection. | ||
[[File:GDB_Conn_V2.png]] | [[File: GDB_Conn_V2.png]] | ||
* Select ''SSH'' for the connection type and click ''OK''. | * Select ''SSH'' for the connection type and click ''OK''. | ||
| Line 159: | Line 131: | ||
* Click on the ''Debugger'' tab | * Click on the ''Debugger'' tab | ||
* Enter <code>{{#var:CROSS_COMPILE}}gdb</code> in the ''GDB debugger'' field | * Enter <code>{{#var:CROSS_COMPILE}}gdb</code> in the ''GDB debugger'' field | ||
[[File: | [[File:eclipse_gdb_conn_debian.png]] | ||
* Click ''Apply'' and ''Close'' to finish configuring the debugger | * Click ''Apply'' and ''Close'' to finish configuring the debugger | ||
Latest revision as of 18:23, 28 April 2023
This page is using the default release mx8mm-debian-bullseye-5.4-2.1.x-v1.3.
To view this page for a specific Variscite SoM and software release, please follow these steps:
- Visit variwiki.com
- Select your SoM
- Select the software release
Overview
This guide describes how to use Eclipse to develop and debug applications on the DART-MX8M-MINI.
Create your rootfs with Eclipse debug support
To enable debug support on the target, make sure to have the following packages installed:
- gdbserver
- openssh-sftp-server
The Eclipse IDE supports gdbserver and tcf-agent; both are servers/agents to enable the debug capabilities on the target.
The packages can be installed by running the following commands on the target:
$ apt-get update && apt-get -y upgrade
$ apt-get -y install gdbserver openssh-sftp-server
If you want to learn how to add the packages at compile time, please refer to Adding Debian packages.
Setup Host Computer Environment
Please follow the steps below to prepare a fresh Ubuntu 20.04 installation for Eclipse debugging:
Install Dependencies
$ sudo apt-get update
$ sudo apt-get -y install build-essential gdb gdb-multiarch git default-jre
Install Debian Toolchain
To install the toolchain, follow the Debian Toolchain installation guide.
Download Eclipse
Download Eclipse 2021-06 from here: https://www.eclipse.org/downloads/download.php?file=/technology/epp/downloads/release/2021-06/R/eclipse-cpp-2021-06-R-linux-gtk-x86_64.tar.gz
Run the following command to unpack and install the downloaded Eclipse IDE tarball into a clean directory using the default name eclipse:
$ cd ~
$ tar -xf ~/Downloads/eclipse-cpp-2021-06-R-linux-gtk-x86_64.tar.gz
Create and run a simple application
Run the Eclipse IDE
Run the Eclipse IDE with the following commands:
$ cd eclipse
$ ./eclipse
Select a new workspace (you can just click OK).
Create the Project
You can create different types of projects: C Managed Build, CMake, Meson, or Makefile. This section describes how to create "C Managed Build" projects from within the Eclipse IDE. To create a new project from a "Hello World" template and then display the source code, follow these steps:
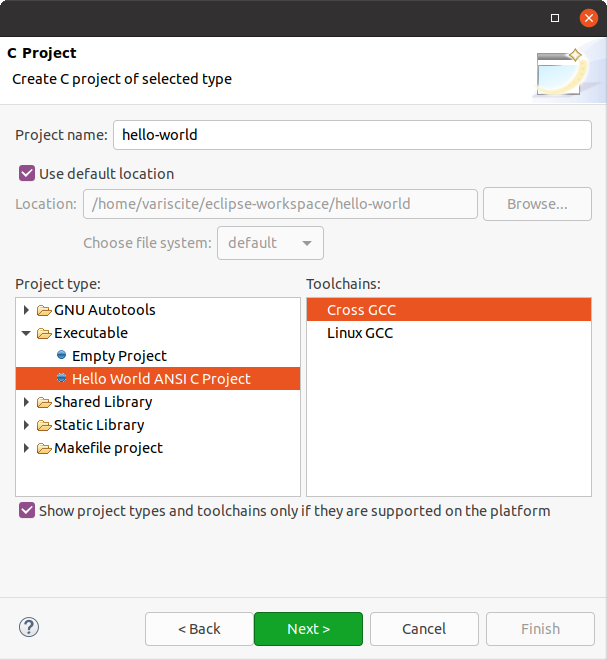
- File->New->C/C++ Project
- Select C Managed Build and click Next.
- Enter a name for the project under the Project name field. Do not use hyphens as part of the name.
- Select Hello World ANSI C Project.
- Select Cross GCC toolchain
- Click Next.
- Add information in the Author field and make sure the License field is correct and click Next.
- Accept the default Debug/Release configurations and click Next.
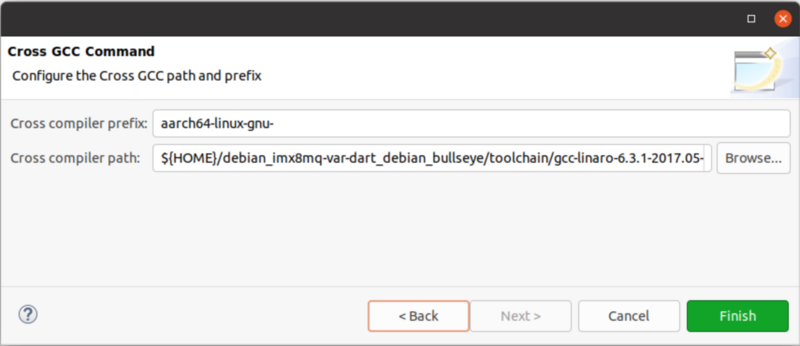
- Enter
aarch64-linux-gnu-under Cross compiler prefix - Enter
${HOME}/debian_imx8mm-var-dart/toolchain/gcc-linaro-6.3.1-2017.05-x86_64_aarch64-linux-gnu/binunder Cross compiler path
- Click "Finish".
- Click on "Workbench".
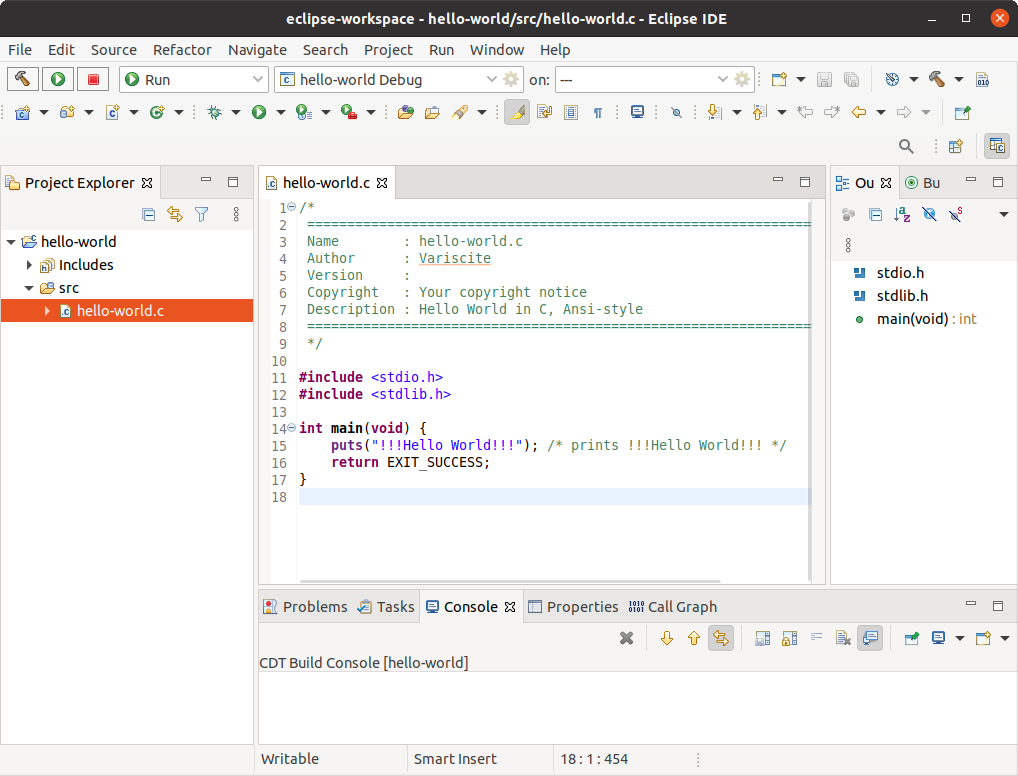
- You should now be in the C/C++ perspective. The left-hand navigation pane shows your project. You can display your source by double clicking the project's source file.
Configure Cross Compiler
The sysroot flag must be added to the linker and C/C++ compilers within Eclipse:
- Right click on the project and select Properties
- Under C/C++ Build, select Settings
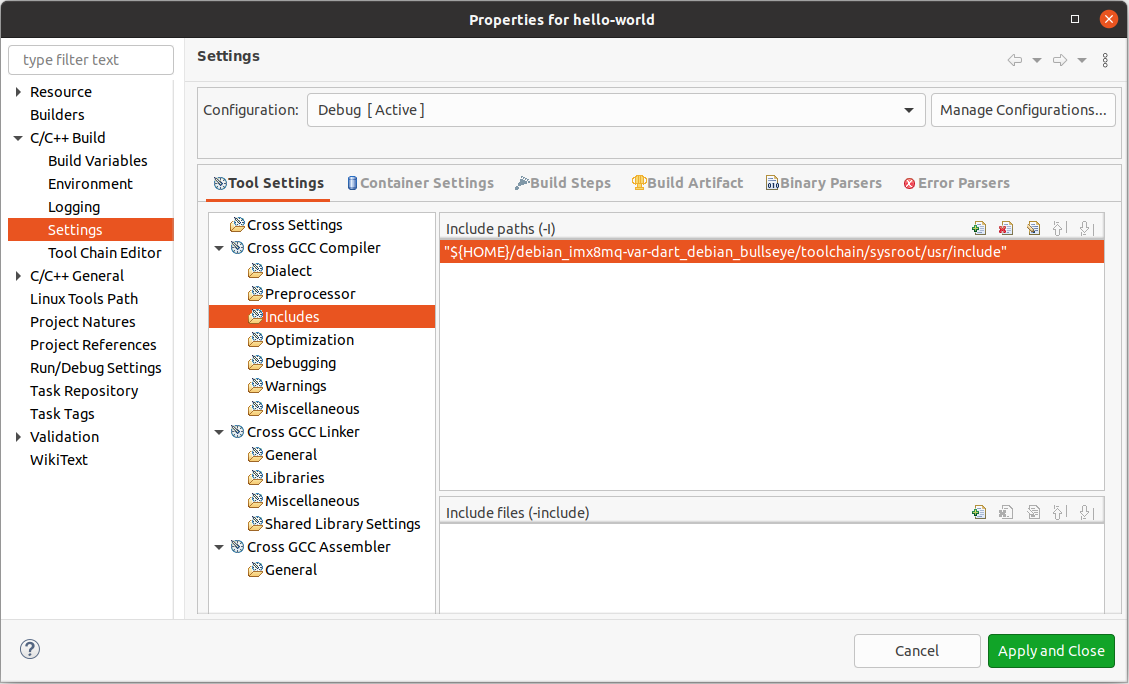
- Add the following include path to Cross GCC Compiler->Includes
${HOME}/debian_imx8mm-var-dart/toolchain/sysroot/usr/include
C/C++ Build -> Settings -> Cross GCC Compiler -> Includes
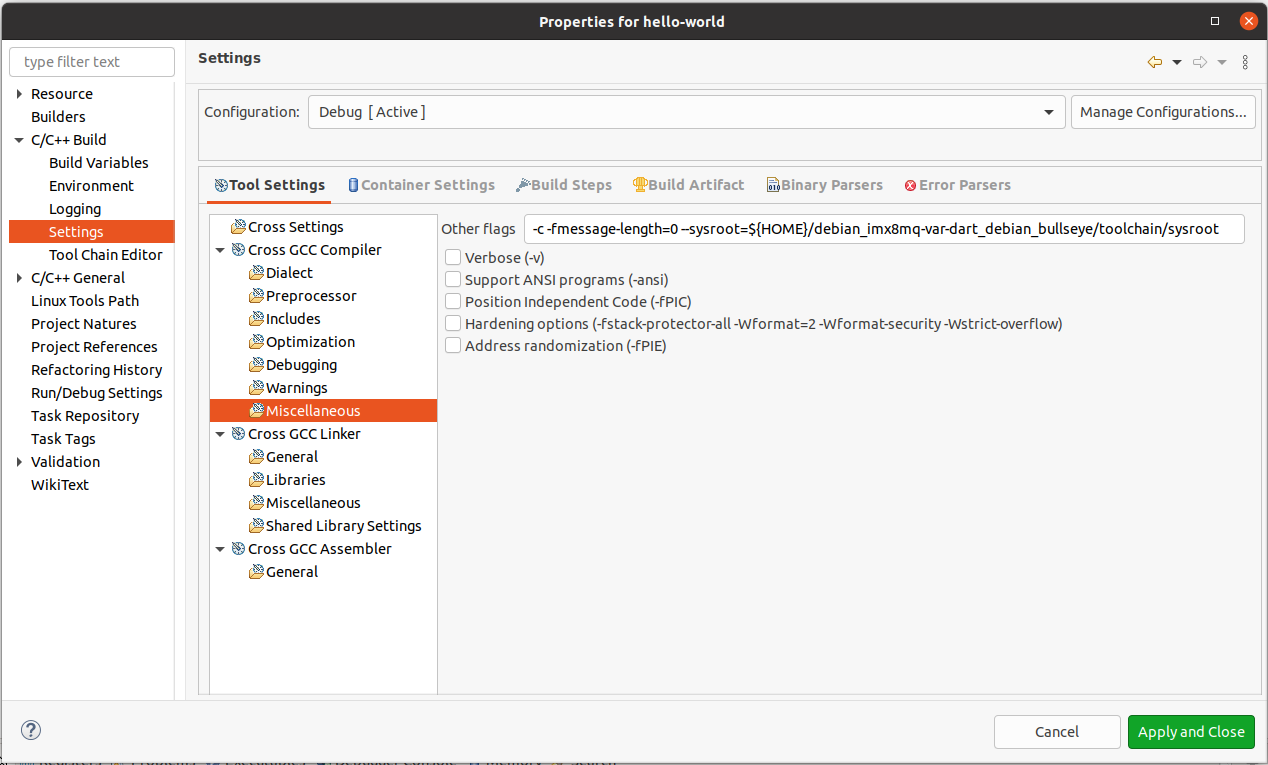
- Append the following to Cross GCC Compiler -> Miscellaneous -> Other Flags:
--sysroot=${HOME}/debian_imx8mm-var-dart/toolchain/sysroot
C/C++ Build -> Settings -> Cross GCC Compiler -> Miscellaneous
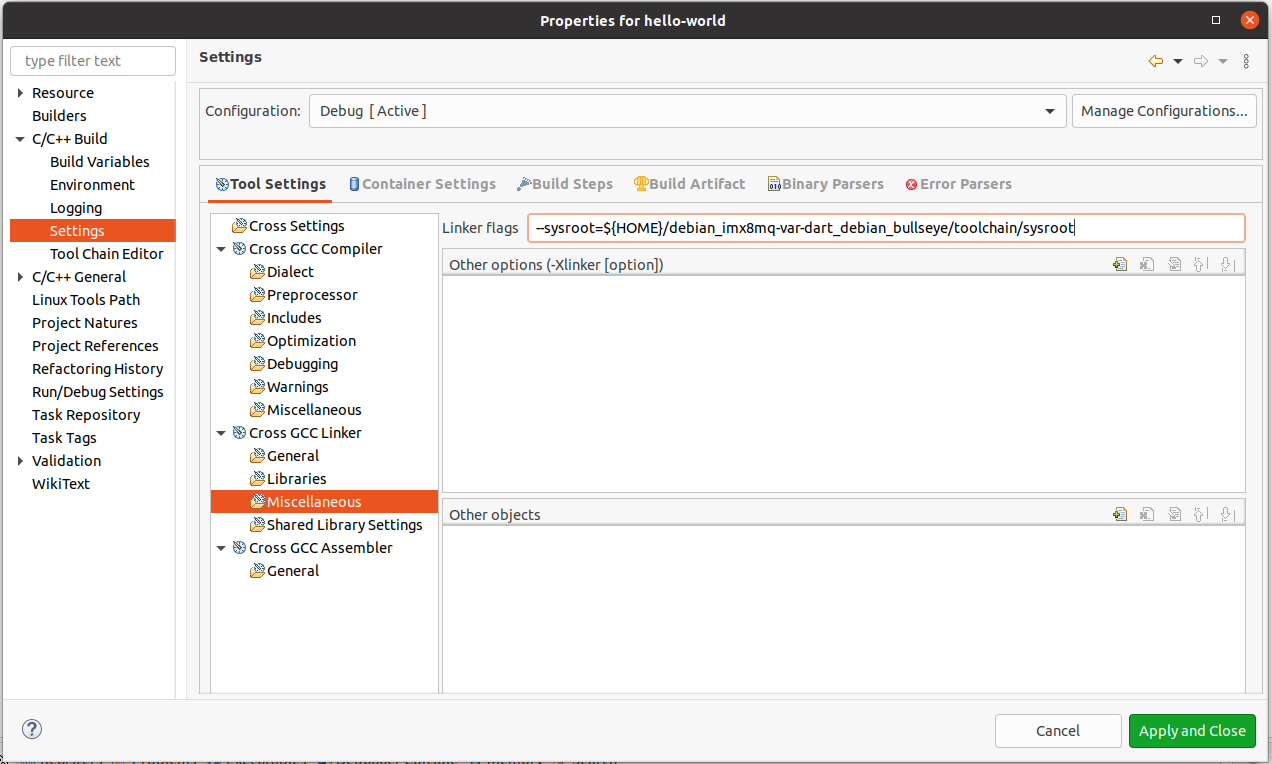
- Append the following to Cross GCC Linker -> Miscellaneous -> Other Flags:
--sysroot=${HOME}/debian_imx8mm-var-dart/toolchain/sysroot
C/C++ Build -> Settings -> Cross GCC Linker -> Miscellaneous
Configure Remote Debugging
The target should be connected to the network via Ethernet or WIFI.
Use the "ifconfig" command on the target to get its IP address.
From Eclipse:
- Click Run->Debug Configurations...
- Double click on C/C++ Remote Application.
- In the Main tab, section C/C++ Application, type
Debug/hello-world. - Next, click on New... to create a new connection.
- Select SSH for the connection type and click OK.
- Enter the Target IP Address.
- Enter root for the user.
- Change to "Password based authentication" and enter password 'root'.
- Click Finish
- Type "/root/hello-world" in the Remote Absolute File Path for C/C++ Application field
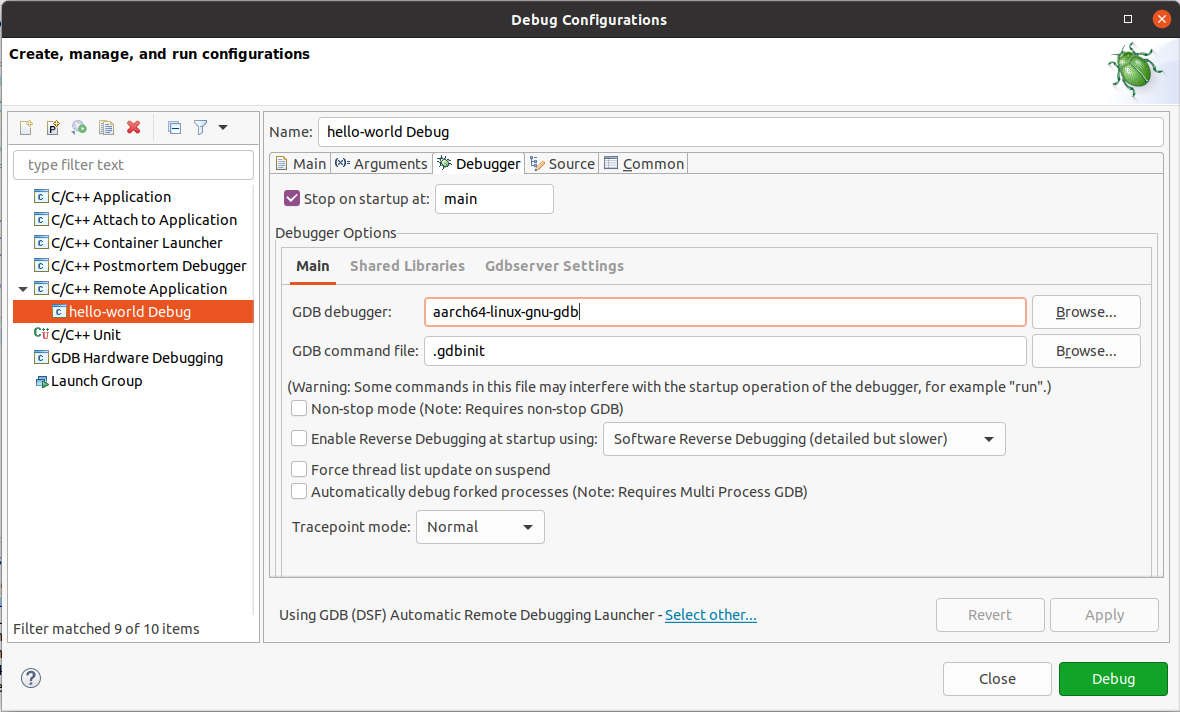
- Click on the Debugger tab
- Enter
aarch64-linux-gnu-gdbin the GDB debugger field
- Click Apply and Close to finish configuring the debugger
Remote debug
Follow the below steps to remotely debug your application on the DART-MX8M-MINI.
- Use the keyboard shortcut ctrl-b to rebuild the application.
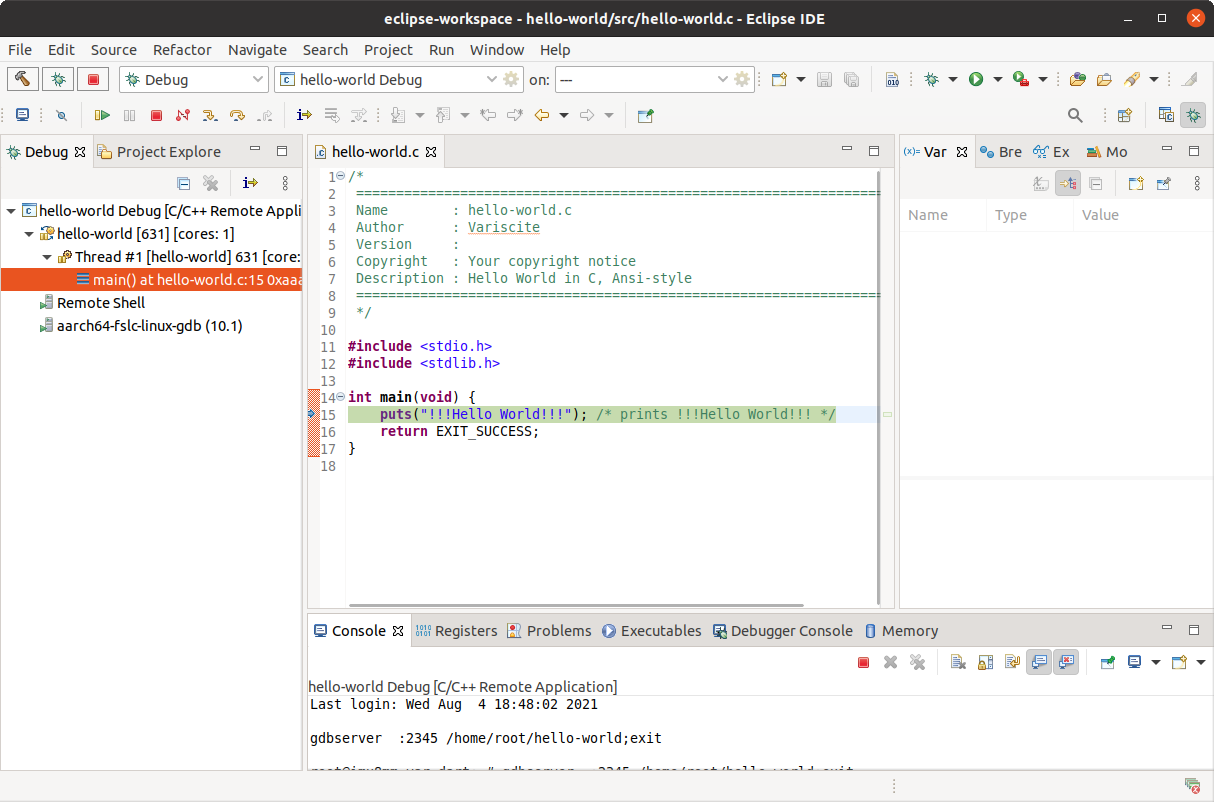
- Click the bug icon in the toolbar and select "hello-world debug" (or whichever name you supplied in the previous step)
- Follow the prompt to switch to the Debug perspective
You can now run and debug your program via eclipse. The actual program execution is done on the target, and the output is seen on the Remote Shell on Eclipse.
