IMX8 Android Audio: Difference between revisions
| (20 intermediate revisions by 3 users not shown) | |||
| Line 1: | Line 1: | ||
<!-- Set release according to "release" parameter in URL and use RELEASE_O8.1.0_1.3.0_8M_DART-MX8M as default | <!-- Set release according to "release" parameter in URL and use RELEASE_O8.1.0_1.3.0_8M_DART-MX8M as default | ||
--> {{INIT_RELEASE_PARAM|RELEASE_O8.1.0_1.3.0_8M_DART-MX8M}}<!-- | |||
--> {{#vardefine:RELEASE_PARAM|{{#urlget:release}}}} <!-- | --> {{#vardefine:RELEASE_PARAM|{{#urlget:release}}}} <!-- | ||
--> {{#lst:Android_Platform_Customization|{{#var:RELEASE_PARAM|RELEASE_O8.1.0_1.3.0_8M_DART-MX8M}}}} <!-- | --> {{#lst:Android_Platform_Customization|{{#var:RELEASE_PARAM|RELEASE_O8.1.0_1.3.0_8M_DART-MX8M}}}} <!-- | ||
--> {{PageHeader|{{#var:HARDWARE_NAME}} - Android {{#var:ANDROID_NAME}} {{#var: | --> {{PageHeader|{{#var:HARDWARE_NAME}} - {{#switch: {{#var:ANDROID_NAME}} | Android 10 = {{#var:ANDROID_NAME}} | Android 11 = {{#var:ANDROID_NAME}} | | Android 12 = {{#var:ANDROID_NAME}} | Android 13 = {{#var:ANDROID_NAME}} | Android {{#var:ANDROID_NAME}} }} - Audio}} {{DocImage|category1=Android|category2={{#var:HARDWARE_NAME}}}} __toc__ | ||
==Android Audio== | ==Android Audio== | ||
To give you overview we recommend you go through the https://source.android.com/devices/audio | To give you an overview we recommend you go through the https://source.android.com/devices/audio document(s).<br> | ||
and get familiar with the terminologies and configuration. <br> | |||
This requires prior knowledge of the Linux Kernel Alsa layer and https://www.alsa-project.org/wiki/Developer_Zone. <br> | |||
===Android Provides=== | ===Android Provides=== | ||
# Audio HAL from NXP | # Audio HAL from NXP and json configuration files. | ||
# Variscite adds EVK hardware support such as codec, DMIC support to the HAL. | # Variscite adds EVK hardware support such as codec, and DMIC support to the HAL. | ||
# Once you program the images, it comes with the required HAL support to verify the Audio input / Output Functionality. | # Once you program the images, it comes with the required HAL support to verify the Audio input / Output Functionality of the Dev Kit. | ||
===Hardware Setup=== | ===Hardware Setup=== | ||
===={{#var:HARDWARE_NAME}}==== | ===={{#var:HARDWARE_NAME}}==== | ||
- Line IN: J21 - Audio Jack 3.5 mm <br> | - Line IN: J21 - Audio Jack 3.5 mm. <br> | ||
- Headphone Out: J22 - Audio Jack 3.5mm <br> | - Headphone Out: J22 - Audio Jack 3.5mm. <br> | ||
- DMIC: On board | - DMIC: On board (Default Audio In route). | ||
====Audio In==== | ====Audio In==== | ||
- Connect 3.5 mm jack to Audio In: Ref:https://www.amazon.ca/AmazonBasics-3-5mm-Stereo-Audio-Cable/dp/B00NO73MUQ <br> | - Connect 3.5 mm jack to Audio In: Ref:https://www.amazon.ca/AmazonBasics-3-5mm-Stereo-Audio-Cable/dp/B00NO73MUQ. <br> | ||
- One end to Audio Output of the source you wish to record, one end to Audio In Jack of the {{#var:HARDWARE_NAME}} see above <br> | - One end to Audio Output of the source you wish to record, one end to Audio In Jack of the {{#var:HARDWARE_NAME}} see above: <br> | ||
====Audio Output==== | ====Audio Output==== | ||
- Connect 3.5 mm headphone jack to headphone / speaker | - Connect 3.5 mm headphone jack to headphone/speaker. | ||
==Audio In test== | ==Audio In test== | ||
- Start Sound | ====DMIC test==== | ||
- | By default, if you don't connect the audio input is selected via onboard DMIC. <br> | ||
- Start the Sound Recorder app as per below screenshot:<br> | |||
- If the app asks for permissions click on allow for microphone and internal storage dialoge.<br> | |||
== | ====Line In test==== | ||
Use the above recording application to record via the application. | |||
- Run the below commands on adb shell | |||
# tinymix 'Headphone Volume' 35;tinymix 'Capture Input' ADC;tinymix 'DMIC Mux' DMIC2; | |||
- Make sure you have an audio line in the source playing some music if you are performing Line In test.<br> | |||
- Click on the record button and you should see the below screen.<br> | |||
[[File:Imx8_Audio_In.png]] | |||
== | ==Audio Out test== | ||
To | - To review recorded audio, you may click on the play button <br> | ||
[[File:Imx8_Audio_Review.png]] <br> | |||
- Click on the music player app (Cactus Player) <br> | |||
[[File:Imx8_Audio_Out_Cactus_Player.png]]<br> | |||
- Click on music / recorded audio you captured <br> | |||
[[File:Imx8_Audio_Out_Cactus_Playing_Audio.png]]<br> | |||
Latest revision as of 10:28, 18 September 2023
This page is using the default release RELEASE_O8.1.0_1.3.0_8M_DART-MX8M.
To view this page for a specific Variscite SoM and software release, please follow these steps:
- Visit variwiki.com
- Select your SoM
- Select the software release
Android Audio
To give you an overview we recommend you go through the https://source.android.com/devices/audio document(s).
and get familiar with the terminologies and configuration.
This requires prior knowledge of the Linux Kernel Alsa layer and https://www.alsa-project.org/wiki/Developer_Zone.
Android Provides
- Audio HAL from NXP and json configuration files.
- Variscite adds EVK hardware support such as codec, and DMIC support to the HAL.
- Once you program the images, it comes with the required HAL support to verify the Audio input / Output Functionality of the Dev Kit.
Hardware Setup
DART-MX8M
- Line IN: J21 - Audio Jack 3.5 mm.
- Headphone Out: J22 - Audio Jack 3.5mm.
- DMIC: On board (Default Audio In route).
Audio In
- Connect 3.5 mm jack to Audio In: Ref:https://www.amazon.ca/AmazonBasics-3-5mm-Stereo-Audio-Cable/dp/B00NO73MUQ.
- One end to Audio Output of the source you wish to record, one end to Audio In Jack of the DART-MX8M see above:
Audio Output
- Connect 3.5 mm headphone jack to headphone/speaker.
Audio In test
DMIC test
By default, if you don't connect the audio input is selected via onboard DMIC.
- Start the Sound Recorder app as per below screenshot:
- If the app asks for permissions click on allow for microphone and internal storage dialoge.
Line In test
Use the above recording application to record via the application.
- Run the below commands on adb shell
# tinymix 'Headphone Volume' 35;tinymix 'Capture Input' ADC;tinymix 'DMIC Mux' DMIC2;
- Make sure you have an audio line in the source playing some music if you are performing Line In test.
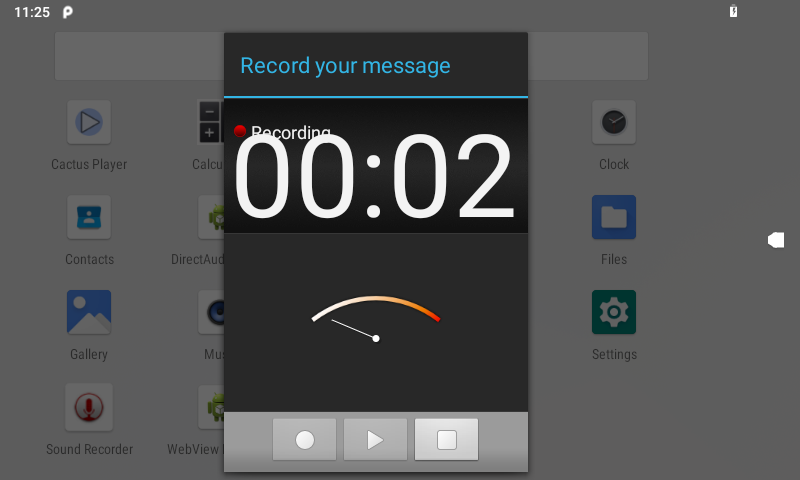
- Click on the record button and you should see the below screen.

Audio Out test
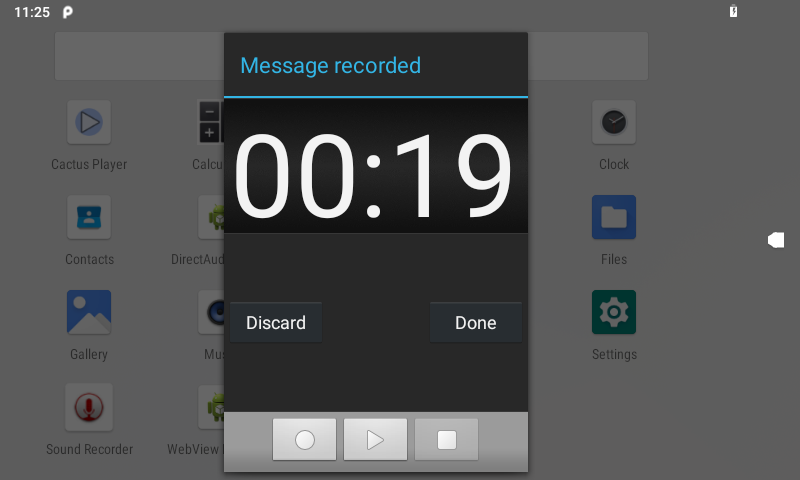
- To review recorded audio, you may click on the play button

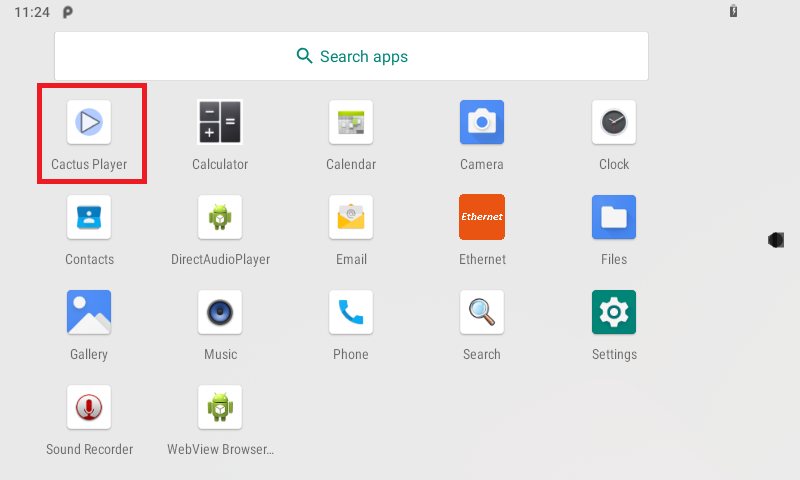
- Click on the music player app (Cactus Player)

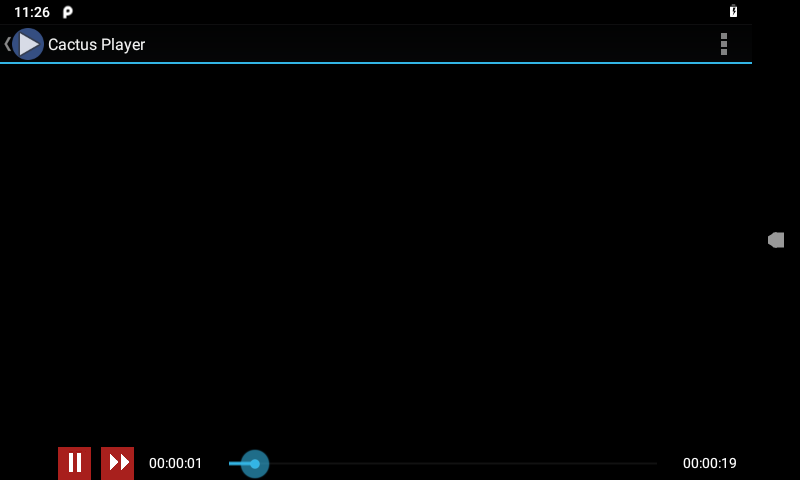
- Click on music / recorded audio you captured
